How to Record a Live PA Set in Ableton
Recording the sets that you play with Ableton Live allows you to build an archive of your live performances; after the show, you can go back, listen to the set, and figure out what worked and what didn’t. You can always just record into Arrangement View, but writing eight or more audio tracks at once — while also playing clips and running VST effects — can quickly overwhelm your system, causing drop-outs in the audio. Here’s how to record a live PA set in Ableton without any external devices, and without burdening your poor overworked hard drive too much.
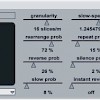
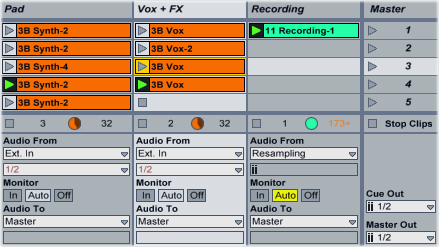 Create a new audio channel (Ctrl + T) and rename it “Recording.” In the new audio channel’s In/Out section, select “Resampling” from the “Audio From” menu. Arm the channel for recording; the stop button on every clip slot will change to a record button. Ableton will now record the output from the master channel — including any return or master effects that you’re running — onto this audio channel.
Now select all of the clip slots in the Recording channel except for the first one. Press Ctrl + E (Command + E on a Mac) to remove the recording buttons from the slots. Start playing the first scene; Ableton will start recording your live PA set into the first clip slot. Trigger another scene or clip; instead of starting a new recording, Ableton will keep recording into the first clip slot. In the end, you’ll have one audio file containing your entire set in that slot. When you’re done playing your live PA set, crop the recorded audio file, open it up in your file browser, and transcode it to MP3 or burn it to a CD.