Tune Synths to A432 in Ableton
The idea that the note A3 should correspond to the frequency 440 Hz is a fairly recent one; although A440′s been in use since the 19th century, it’s only since the 1950s that it’s been accepted as the standard tuning. Before that, A was tuned to anywhere from 415Hz up into the 480s. Composer Giuseppe “Four Seasons” Verdi was a fan of tuning A to 432Hz; in Italy, this tuning was made the legal standard. Some say that A432 is the natural tuning of the Earth, others that A440 standardization was a Nazi plot to unbalance the universe; in any case, the lower-frequency tuning of A432 sounds great when you’re producing bass-heavy electronic music.
Many modern soft-synths support retuning to A432 right out of the box: Omnisphere, Trillian, and Albino, for example, let you set the master tuning frequency in the options menu, while synths like Absynth and Pianoteq can open special tuning files. If the synth you’re using doesn’t support retuning, you can use a specialized plugin to tune A to 432Hz in Ableton.
You’ll need to grab two files before you can tune the synth to A432: a microtuning VST and a scale file. Download the MidiBag plugin collection fromTobybear ProductionsTobybear has apparently closed up shop. Please contact Tobybear if you're looking for a copy of this plugin , install the MicroTuner plugin from the pack, then download and extract this tuning file.
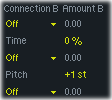 Load up a synth VST on an empty MIDI channel (I’m using Ableton Operator, but any synthesizer that lets you change the pitch bend range will work). Set the synth’s first oscillator to a sine wave; this lets you easily hear the difference when you re-tune the synth. Set the pitch bend range to 1 semitone. In Operator, this setting is in the Volume section; your synth may vary.
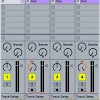
Next, create two new MIDI tracks. Rename the second new MIDI track to “Control”; you’ll be using this track to send input MIDI notes through MicroTuner. Arm the “Control” track for recording, or drop a MIDI clip onto it.
Now we’ll need to send the MIDI notes through MicroTuner. Open the track routing controls, if they’re not already open, by clicking the “I-O” button in Ableton. Set the synth’s and MicroTuner’s “Monitor” switches to “In.” Set up the track routing menus like this:
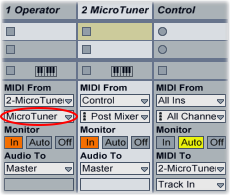
- Set the Control channel’s first “MIDI To” menu to “MicroTuner.”
- Set MicroTuner’s “MIDI From” menu to “Control” (this isn’t totally necessary, but it ensures that MicroTuner is only receiving MIDI from the control channel).
- Set the synth’s first “MIDI From” menu to “MicroTuner”; set its second “MIDI From” menu to MicroTuner as well.
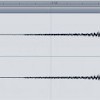
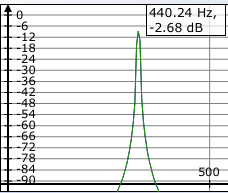
Play an A3 note using a MIDI keyboard or a MIDI clip. Here’s what the note sounds like unaltered:
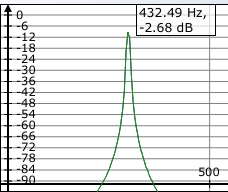
Now let’s tune the synth to A432. Load the tuning file that you downloaded into the MicroTuner plugin (you can either click the “Load” button in the VST, or just drag and drop the tuning file onto the plugin window). Play an A3 note again:
If you want to see how this works, record a clip onto the synth’s channel, then open up the clip’s pitch bend envelope. The MicroTuner plugin calculates the amount of pitch bend needed to move each note into the A432 tuning, then applies the bend to the clip envelope.
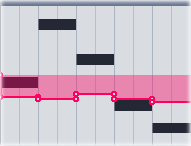 You can also probably see some of the issues inherent in this technique. Because MicroTuner uses pitch bend to re-tune the notes, it only really works if you play one note at a time (chords will confuse it). Also, sending MIDI from the control channel, through MicroTuner, then to the synth can move the notes off the MIDI grid; to fix this, you’ll need to quantize the notes, then manually move the pitch bend envelope points so they align with the notes. Still, if the synth you’re using doesn’t support microtuning, this plugin can provide a useful workaround that gets your music back in harmony with the universe.


