How to Synthesize Drums
Samples make creating beats quick and easy, but knowing how to synthesize your own kicks, snares and hi-hats will give you a better understanding of how drum sounds work.
Kick
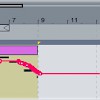
Start up Ableton’s Operator synth, then create a new MIDI clip. Add a note on each quarter beat. It doesn’t matter which note you use: you’ll be setting the pitch using the synthesizer itself.
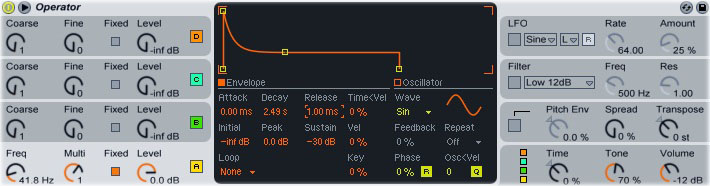
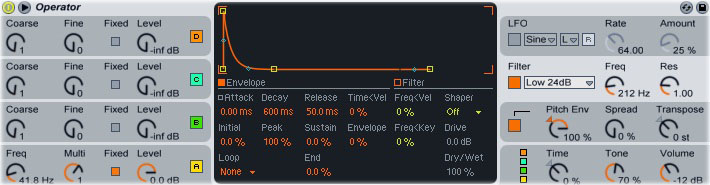
Switch over to the Operator control panel (Shift+Tab). Click oscillator A. Click the “Fixed” box and set the “Freq” knob to about 50 Hz. Set “Decay” to around 2 seconds (not milliseconds) and turn “Sustain” down to about -40. Set “Release” to about 60 ms; leave the “Attack” setting at the default.
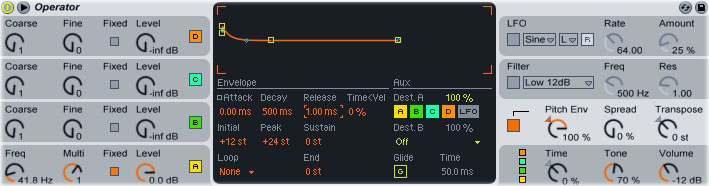
Click the box in the “Pitch Envelope” section. These controls determine how the pitch of the sound changes over the course of the drum sound. Turn the “Pitch Env” knob all the way up to 100%, then set the pitch “Decay” to 500 ms and the “Peak” to +24. Turn “Release” down to 1 ms. Leave “Initial” and “Attack” set at +12 and 0, respectively:
Click the “Filter” box to turn on the filter, then select “Low 24dB” as the filter type. Start playing back the MIDI clip, then adjust the “Freq” knob to change the degree of filtering. A lower setting will produce a deeper-sounding kick, while a higher setting will make the kick punchier:
Snare
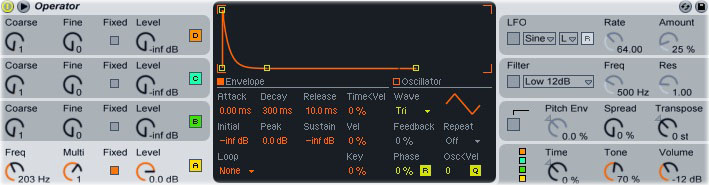
Load a blank Operator into a new track. Click oscillator A, then set its “Wave” setting to “Triangle.” Click the “Fixed” button on oscillator A, then set the “Freq” knob to around 200 Hz. Click the “Envelope” button, then set “Decay” to about 300 ms and “Release” to about 10 ms. Turn “Sustain” all the way down until it reads “-inf”:
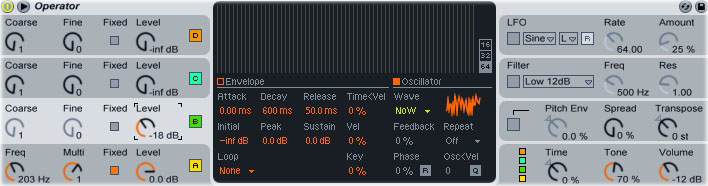
Click on oscillator B. Set its “Wave” to “Noise White,” then slowly turn up its “Level” knob to mix the noise into the sound. The more noise you add, the sharper the snare will be:
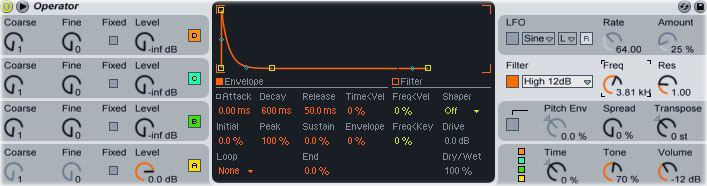
Hats
Load up a blank Operator, then set oscillator A’s “Wave” parameter to “Noise White.” Drag the “Sustain” control down to “-inf,” then start playing the hi-hat. Drag the “Decay” control slowly downward; the shorter the decay setting, the snappier the hi-hat will be:
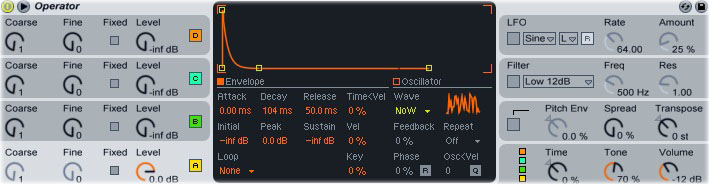
Click the “Filter” box, then set the filter type to “High 12dB.” Turn up the “Freq” knob to eliminate low frequencies from the hat:
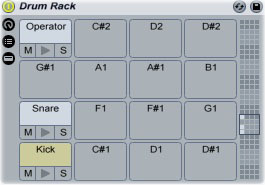
You can use any of these synthesized drum sounds in combination with samples by moving the Operator into a Drum Rack. Drum Rack will play the synthesizer as if it were a sample: