Using Keytracking
Keytracking changes a synthesizer’s parameters depending on which note the synth is playing. When positive keytracking is enabled for a parameter, the parameter increases for high notes and decreases for low notes (negative keytracking does the reverse). Most synthesizers include at least a couple of keytracking settings; use them to make your synth patches more interesting and lively.
Start by programming a simple synth patch into Analog (or whatever synth you’re using). Set Oscillator 1 to a square wave; set Osc 2 to a sawtooth wave and tune it up 7 semitones. Send them both to Filter 1, then set the filter’s type to LP24 and its frequency cutoff to around 4 kHz.
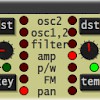
Click the Filter 1 section, then turn the “Key” parameter in the Freq Mod section up to about 2.20. Now when you play the synth, the filter will open as the notes move up the scale:
You can also use negative keytracking values to increase a parameter as the notes move down the scale. Right now, the lowest note is getting lost, and the highest note is too harsh. Set the “Key” parameter in the Res Mod section of the filter to around -1.50. This makes the filter’s resonance — or width — widen for the lower notes, letting more of the sound through, and narrow for higher notes.
Your browser does not support HTML5 audio. The highest notes are still a little too loud, so let’s use keytracking to lower the synth’s output level as the notes go up. Click the “Amp 1″ section, then look under “Level Mod.” Set the Level Mod Key control to around -0.50. This makes the synth’s volume go down as the notes go up the scale. Let’s add a little movement to the synth as well: set the “Key” parameter in the Pan Mod section to 0.50. This makes the sound move from left to right as you go up the scale:


