Organizing Clips for Live PA in Ableton
Using Ableton Live to, well, play live requires a different approach from producing in the studio. You need to be able to trigger clips quickly, with a minimum of thought involved, and you can’t stop and restart anything while you’re playing. Here’s my system for organizing clips for a live PA set:
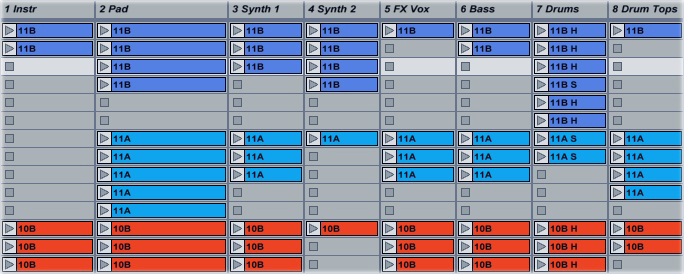
I start by dividing the clips into categories. I separate them into “Instruments” (guitars, strings, pianos, etc.), “Pad” (background synths), “Synth 1″ and “Synth 2″ (lead synths), “FX Vox” (risers, vocal samples, stabs, etc.), “Bass,” “Drums,” and “Drum Tops” (percussion, hi-hat loops, and so on). This gives me eight audio tracks, meaning that I can control all the tracks in the set from an APC40 without having to worry about the bank select keys.
I then label the clips by key using the Camelot harmonic mixing system. This system uses alphanumeric codes to represent keys; G major, for example is 9B. During a set, you can move from 9B to 9A, 10B or 8B, and the mix will sound in key. The advantage of this system is that I don’t need to stop and figure out whether two keys are harmonically compatible: as long as I’m only moving one step at a time, the mix will sound good.
Finally, I color-code the clips by key. I also label the drum clips with an “H” for a four-to-the-floor beat or an “S” for a breakbeat. When everything’s organized, I can quickly combine clips from different tracks together with a minimum of cueing and previewing.