Make a Synth from a Sample
All sounds, synthesized or natural, are made up of waves. Most synthesizers produce simple, pure waveforms, while naturally occurring sounds are much messier — and more interesting. Use a short segment of a sound you’ve recorded to create a unique synthesizer-like instrument using Ableton’s Sampler.
Load up Sampler, then drop in a recorded sample. I’m using a recording of a door closing, which you can download here (right-click and save).
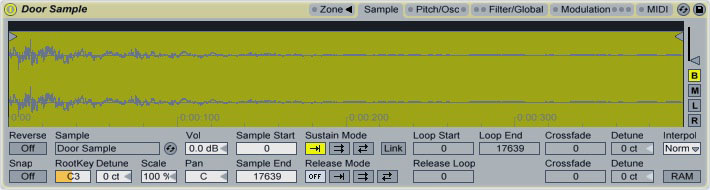
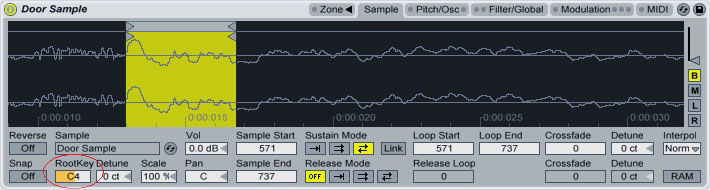
Set the Sustain mode to “Loop Back and Forth.” Drag the handles at the top of the sample window to select a very short portion (just a few milliseconds). Press a key on your MIDI or computer keyboard to hear what the sample sounds like; in this case, it’s too high-pitched, so I’ll drop it down an octave by setting the “Rootkey” to C4:
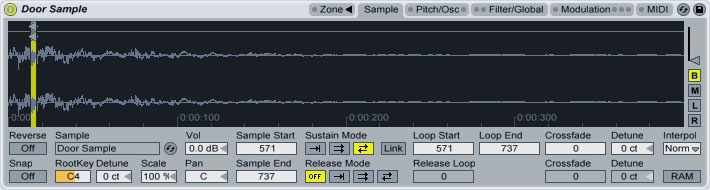
This zoomed-out view of the sample gives you an idea of how short the selected region should be:
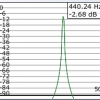
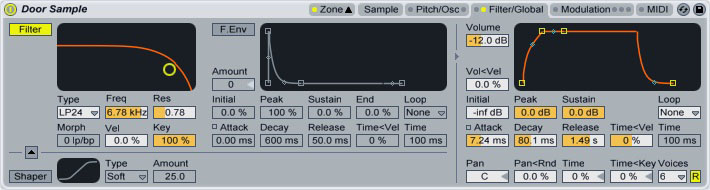
This sample has some high-frequency noise in the background, so we’ll filter that out. Click over to the “Filter/Global” section of Sampler and turn on the filter. Set the cutoff point at around 7 kHz. The sample also starts and ends a little abruptly, so let’s lengthen the attack and release times in the envelope section slightly:
We’ve now essentially turned the sample into a one-oscillator synth. Let’s make it more interesting by adding extra layers to the sound. Click the “Zone” tab, then click on the sample in the list that opens. Press “Ctrl+D” twice to make two copies of the sound.
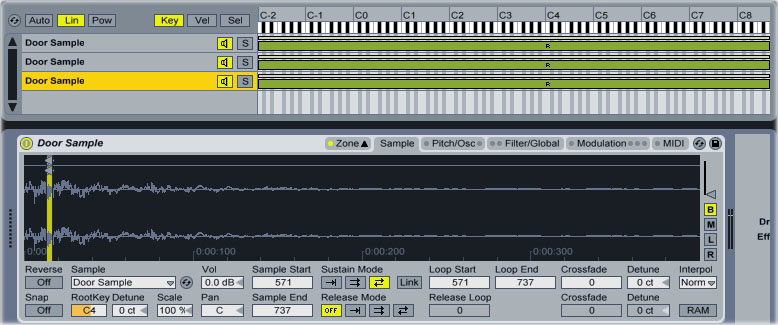
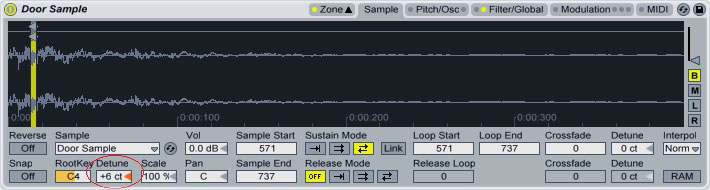
Double-click the first duplicated copy, then set its “Detune” control to somewhere between +3 and +7. This moves the sample slightly out of tune from the original sample, making a fatter sound:
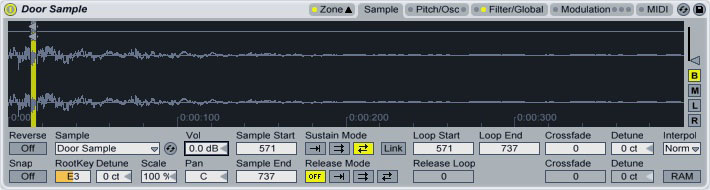
Click on the second copy of the sample, then set its “RootKey” control to “E3.” This adds a higher-pitched sound to the synth. If you hear unwanted high frequencies in this new sound, bring down the cutoff on the Sampler’s filter.
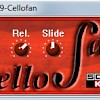
Use an EQ to cut out the very low and very high frequencies, then drop in a reverb to smooth out the sound:

Want to get deeper into synthesis? Check out this tutorial series from the Bob Moog Foundation (get 20% off by using this link).