How to Create a Multi-Sample in Ableton Sampler
Ableton’s Sampler plug-in is a powerful audio manipulation tool that lets you transform raw audio samples into a playable instrument. To make complex multi-samples in Ableton, use Sampler to combine up to 128 waveforms, then use the Zone section of the plug-in to map the samples to different MIDI notes and velocities.
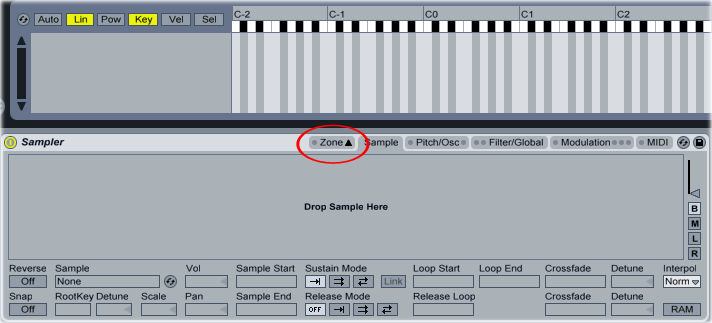
Start by loading up an instance of Sampler. Click the “Zone” button in the top Sampler menu bar to open up the keyboard zone section:
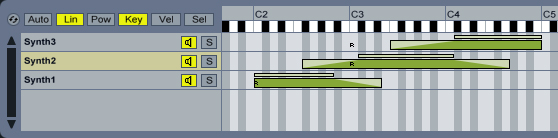
Drag and drop the samples you want to use for the multi-sample into the Zone section. Move the green bars in the keyboard section to map the samples to different zones on the MIDI keyboard. Here, I’ve mapped each sample to its own octave on the keyboard. As you move up the keyboard, Ableton moves from one sample to the next:

Drag the ends of the green bars so that they overlap each other by about half an octave. Move the mouse cursor over the end of the little white bar at the top of one of the green bars, then drag it toward the center of the green bar to create a crossfade for the sample. Repeat the process for the other sample zones. Now, Ableton will gradually fade between the different samples as you move up the scale, instead of jumping from one sample to the next.
You can also map samples to different MIDI velocity ranges in Ableton. Drop a short, stabby sample into the Zone section, then click the “Vel” button to switch to the velocity zone. Drag the left edge of the red bar next to the newly added sample to 72, then create a crossfade as you did with the keyboard mapping. Ableton now plays the stab, but only when the MIDI note’s velocity is above 72: