Tips for Using Reverb
A reverb effect creates a complex series of echoes from a source sound. Reverb usually simulates a certain listening environment like a jazz club or a concert hall; used heavily and creatively, it can also warp a source sound until it’s unrecognizable.
Return Channels
For the best-sounding reverb, put the effect plugin on a return channel. Turn the reverb’s wet/dry control up to 100%, then use each source channel’s send knob to control how much reverb you’re putting on the channel:
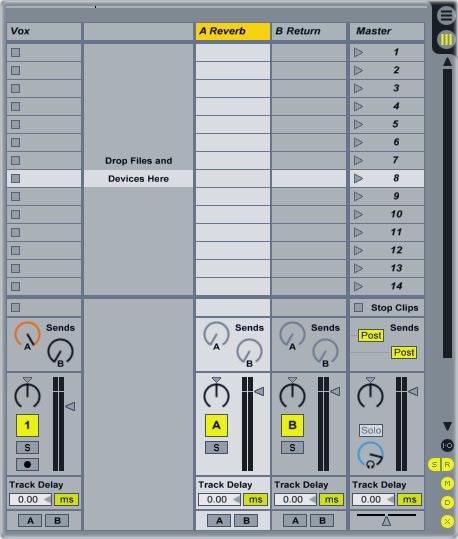
Putting the reverb on a return channel, instead of dropping one reverb plug-in onto each audio channel, does two important things. First, it conserves memory and CPU: with a return channel, you can use the same reverb plug-in for multiple audio channels. Second, it ensures that different instruments sound like they’re playing in the same space. If you send a synth track and a vocal track to the same reverb return channel, the resulting reverb will sound much more coherent than if you had used a separate reverb for each instrument.
Filtering Reverb
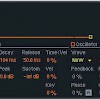
Reverb sounds best on higher-frequency sounds. Adding reverb to a low-pitched sound makes it sound muddy: basslines and kick drums, for example, usually sound terrible with reverb. If the sound to which you’re applying reverb contains both low and high frequencies, filter out the lower frequencies before they get to the reverb. Most reverb plug-ins — including Ableton’s reverb — include a built-in filter that can remove low frequencies from the reverberated signal:
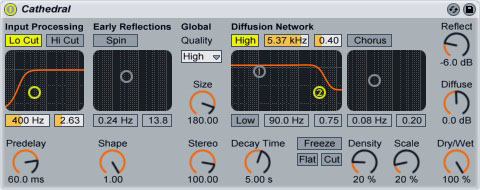
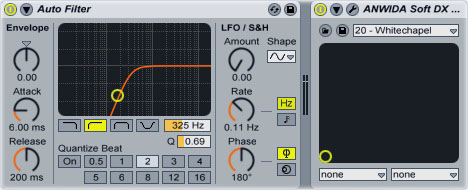
If the reverb plug-in you’re using doesn’t have this feature, add a high-pass filter to the return channel in front of the reverb:
Both methods will remove the low-pitched frequencies from the reverb channel, keeping it sounding clean and smooth.
Automating Reverb
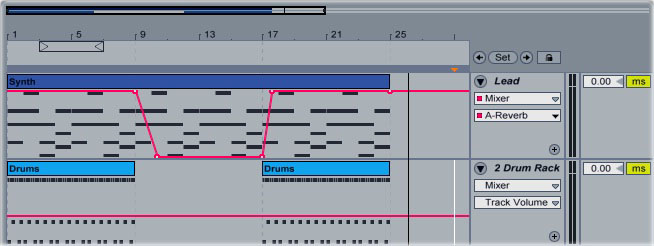
Automation allows you to change the amount of source signal that goes to the reverb channel over the course of a song. To automate the level of reverb on a track, draw an envelope on the reverb send’s automation lane. You can open a track’s send automation lane by right-clicking the send knob and selecting “Show Automation.” Once you’ve opened the automation lane, use the pencil tool to draw the envelope.
In this mix, the synthesiser starts out with the full amount of reverb (the “Send A” knob is at 100%). When the drums stop, the amount of reverb goes down to zero, making the synth move into the foreground of the song. When the drums start again, the reverb amount goes back up, moving the synth into the background:
Predelay
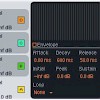
When you apply reverb to a vocal track, the echoes that the reverb unit can overlap with the source audio, causing the words of the song to become indistinct and harder to understand. To keep this from happening, increase the predelay setting on the reverb:
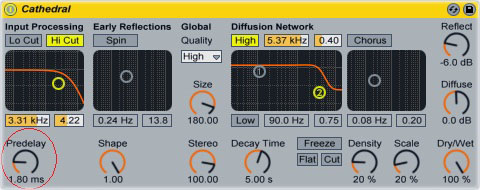
The predelay controls the amount of time between the instant that the reverb receives the source signal and the instant that the echoes start playing. A short predelay setting means that the reverb will start generating echoes immediately after it receives the source sound. A higher predelay setting tells the reverb to wait for a specified amount of time before starting the echoes. Increasing the predelay gives each word in the vocal a chance to be heard before the echoes start overlapping with it.
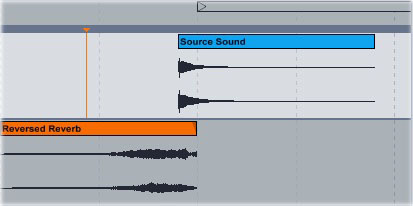
Reverse Reverb
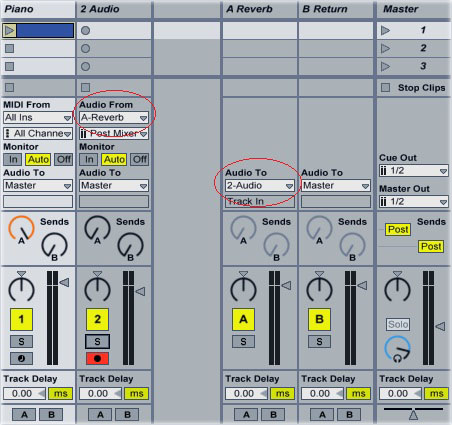
A reverse reverb effect plays the series of echoes from a source sound backwards — before the sound itself. To create a reverse reverb effect in Ableton, put the reverb on a return channel, then send the source sound to the reverb. Create a new, empty audio track, then send the reverb channel’s audio to the audio track. Set the audio track to receive audio from the return channel only:
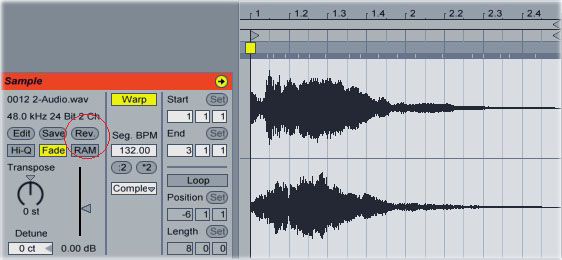
Start recording on the audio track. Let the reverb play out fully, then stop recording. Open the audio clip that you just recorded and click the “Rev” button:
Drag and drop both the source sound and the reversed clip into Arrangement view. Drag the reversed clip in front of the source clip so that the reversed echoes lead into the beginning of the source clip (you may also need to lower the volume of the reversed clip):