• Tempo Envelopes in Ableton Live

    As with nearly all of its parameters, Ableton lets you change the master tempo using an envelope in an automation lane. Unlike most other parameters, though, the master BPM envelope isn’t immediately apparent.

    To change the master tempo envelope, switch to Arrangement view by pressing “Tab”, then right-click the BPM display in the upper-left corner of the Ableton window. Select “Show Automation” from the menu that pops up:
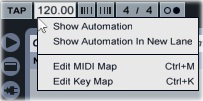
    Master Tempo in Ableton

    Ableton will display a new automation lane in the master channel. Use the two boxes underneath “Song Tempo” to specify the minimum and maximum BPM settings, then draw an envelope to control the tempo. Here, I’ve set the minimum BPM to 100 and the max to 130, then drawn an envelope that takes the tempo from 110 up to 130, then back down to 100:
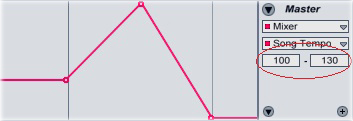
    Master Tempo in Ableton

    Use caution with this technique — it can really annoy DJs when a song changes its tempo mid-track.

  • Cellofan

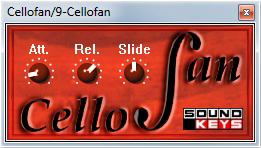
    It’s got three knobs, no patches and only makes one noise, but Cellofan’s cello synthesis is as good or better than most commercial options’, and it’s lightweight and free. You can control the attack and release of the cello, then use the Slide knob to add glide. Cellofan is polyphonic, although it sounds best when it’s only playing one or two notes simultaneously. The only major downsides to the instrument are its lack of velocity control and that it’s only available as a Windows VST instrument. You can download a free copy of Cellofan from Soundkeys.

    Cellofan
  • Using Ableton Utility for Volume Envelopes

    Drawing an envelope onto a track’s volume control in Ableton’s Arrangement view makes the track’s volume fader essentially unusable. If you move the volume slider on a track, Ableton deactivates the automation; this makes it difficult to fine-tune a track’s overall volume while mixing. The solution: use the Utility plug-in to control the volume envelope instead.

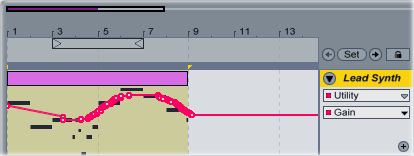
    Drop the Utility plug-in onto the track. Select the plug-in in the track’s Device Chooser section, then select “Gain” from the automation menu. Draw the envelope onto the track:

    Ableton Volume Envelopes

    You can now move the track’s volume fader (in either Session or Arrangement view) to raise or lower the track’s overall volume while preserving the relative volume differences set out by the envelope.

  • Organizing Clips for Live PA in Ableton

    Using Ableton Live to, well, play live requires a different approach from producing in the studio. You need to be able to trigger clips quickly, with a minimum of thought involved, and you can’t stop and restart anything while you’re playing. Here’s my system for organizing clips for a live PA set:

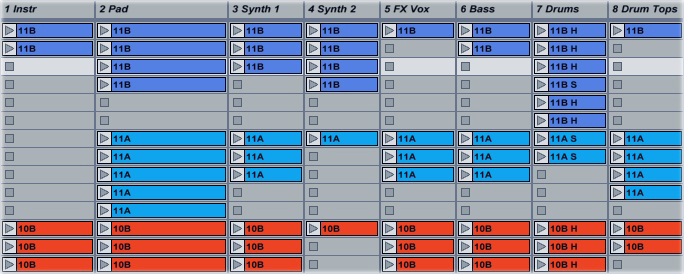
    Ableton clip organization

    I start by dividing the clips into categories. I separate them into “Instruments” (guitars, strings, pianos, etc.), “Pad” (background synths), “Synth 1″ and “Synth 2″ (lead synths), “FX Vox” (risers, vocal samples, stabs, etc.), “Bass,” “Drums,” and “Drum Tops” (percussion, hi-hat loops, and so on). This gives me eight audio tracks, meaning that I can control all the tracks in the set from an APC40 without having to worry about the bank select keys.

    I then label the clips by key using the Camelot harmonic mixing system. This system uses alphanumeric codes to represent keys; G major, for example is 9B. During a set, you can move from 9B to 9A, 10B or 8B, and the mix will sound in key. The advantage of this system is that I don’t need to stop and figure out whether two keys are harmonically compatible: as long as I’m only moving one step at a time, the mix will sound good.

    Finally, I color-code the clips by key. I also label the drum clips with an “H” for a four-to-the-floor beat or an “S” for a breakbeat. When everything’s organized, I can quickly combine clips from different tracks together with a minimum of cueing and previewing.

  • Mapulator Automation in Ableton Live

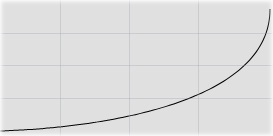
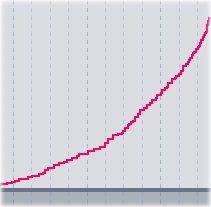
    Among its many abilities, BentoSan’s thoroughly awesome Mapulator plug-in for Max for Live lets you use bezier curves for track automation in Ableton Live. Bezier curves are much smoother and more regular than the automation curves or straight lines that Ableton normally uses. A bezier curve looks like this:

    Bezier Curves in Ableton

    While the typical Ableton automation curve looks more like this:

    Bezier Curves in Ableton Ableton added support for curved automation in Live 9. However this method still gives you move control over the curve.
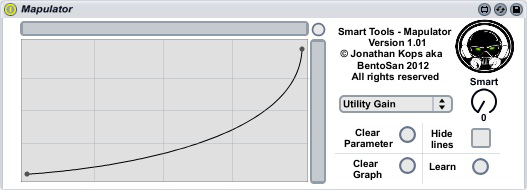
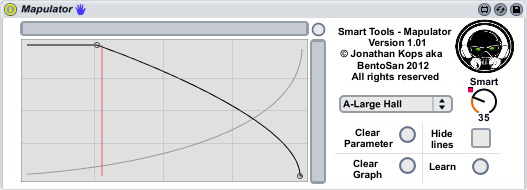
    Let’s use a bezier curve to control the volume envelope for a track. You’ll need to have Max for Live installed. Open up the Max for Live effects folder, drop Mapulator onto an audio or MIDI track, then add a Utility plug-in after the Mapulator. Click the “Gain” knob on the Utility, then click the “Learn” button on Mapulator. This ties the “Smart” knob on Mapulator to the volume control. Click the lower-left corner of the graph window to add the first point. Press and hold the “Ctrl” key, then click and drag downward from the upper-right corner to create a curve.

    Bezier Curves in Ableton

    Select Mapulator in the track’s device chooser drop-down menu, then select “Smart” in the second menu. Draw an envelope onto the track:

    Bezier Curves in Ableton

    When you play the track, the volume will follow the bezier curve — not the straight line. Listen to the difference between a straight-line volume envelope:

    and one that follows a bezier curve:

    Mapulator can control the automation envelopes for up to eight parameters simultaneously. Here, for example, I’ve set up Mapulator so that, when the volume is low, the track is sent to a reverb channel. When the volume increases, the reverb send level drops down:

    Bezier Curves in Ableton